How To Patch A Hole In Drywall - A Simple Guide
Finding a hole in your wall can feel like a real headache, can't it? Maybe a door swung open too hard, or perhaps a picture hook went a little awry. Whatever the cause, that little opening can feel like a big problem, but honestly, it's a fix that's probably easier than you think. You see, with just a few basic things and a bit of patience, you can make that wall look whole again, as a matter of fact, almost as if nothing ever happened.
There are many reasons why a wall might end up with a small gap or a larger break, from moving furniture around to, you know, just an accidental bump. The good news is that mending these spots doesn't require a construction crew or special training. It's a task that many folks can handle on their own, and it can save you some cash too. This little guide is here to walk you through the steps, making it feel less like a chore and more like a straightforward project.
So, if you're looking at a wall with an unwelcome opening and wondering what to do, don't fret. We're going to talk about getting that wall back to looking its best, covering everything from the smallest nicks to areas that need a bit more attention. You'll find that making these repairs can be quite satisfying, actually, giving your home a fresh, tidy appearance once more.
Table of Contents
- Making the Opening Neat for How to Patch a Hole in Drywall
- Preparing the Edges for a Clean Patch in How to Patch a Hole in Drywall
- How Do You Create a Perfect Fit for Your Drywall Patch?
- What Do You Do if the Hole is a Bit Tricky When You Patch a Hole in Drywall?
- Filling the Gap with Compound When You Patch a Hole in Drywall
- How Do You Make Your Own Drywall Patch?
- Getting the Surface Just Right for How to Patch a Hole in Drywall
- What About Those Really Deep Spots in How to Patch a Hole in Drywall?
Making the Opening Neat for How to Patch a Hole in Drywall
When you're faced with an opening in your wall, the very first step is to make that spot as clean and tidy as possible. You might use a sharp utility blade or a small saw designed for walls to make a precise cut around the damaged part. This helps a lot, you know, because a clean, defined space is much easier to work with than a jagged, torn one. It's almost like drawing a neat box around the problem area, making it ready for the next steps.
A small saw, like a keyhole saw, is quite good for getting rid of most of the broken stuff. It helps you take out the main bulk of the damage. Then, for those really neat, straight edges, a sharp blade comes in handy. It lets you slice the paper and gypsum board with a clean finish. This careful preparation is pretty important, actually, because it sets the stage for a patch that will sit flush and look good when you're all done.
Once you've made that opening neat, you can then use it as a kind of guide. It becomes the template for the new piece that will fill the empty space. This initial careful work really pays off later on, making the entire fixing process smoother and, in a way, simpler. You'll find that a well-prepared spot makes everything else fall into place more easily.
Preparing the Edges for a Clean Patch in How to Patch a Hole in Drywall
After you've cut out the main damaged part, you'll probably notice some loose bits of paper or ragged edges around the opening. It's a good idea to tidy these up. Some folks suggest using your sharp blade to gently shave off these paper strands, almost like giving the edges a little trim. This helps prevent them from getting in the way later, and it makes the surface much smoother for applying the patch.
A clever little trick that some people use is to angle their blade just a tiny bit when they're trimming the edges. This creates a slight V-shape groove around the opening. This V-groove is actually quite helpful because it gives the patching material a bit more space to grab onto, making for a stronger bond. It's a small detail, but it can make a difference in how well your repair holds up over time, you know.
Making sure these edges are free of any small, loose pieces of the wall's surface paper is pretty important. If there are bits sticking out, they can create bumps or uneven spots when you try to put on your new piece or spread compound. So, taking a moment to smooth everything out means your new patch will blend in much better, almost disappearing into the wall.
How Do You Create a Perfect Fit for Your Drywall Patch?
Getting the new piece to fit just right is a key step in making your wall look whole again. What you want to do is take your replacement piece of wall material and make it the very same size as the opening you've created. This is pretty important because the closer your new piece matches the space, the better the final result will be. Think of it like a puzzle piece; it needs to slot in perfectly.
One way to do this is to place your new piece of wall material over the damaged spot on the wall. You'll want to make sure the solid part of your patch, not the paper that sticks out a little on the sides, is what you're lining up. Then, with a pencil, you can trace around the shape of your patch onto the wall itself. This pencil line shows you exactly where you need to cut on the wall to make the opening the correct size for your patch. It's a simple yet effective way to ensure a snug fit, you know.
Once you've traced the outline, you'll use your sharp blade or wall saw to cut along that line. Then, you can try fitting your new piece into the opening. It should slide in without too much force but also without being too loose. If it's a bit tight, you can shave off a tiny bit more from the edges of the opening until it fits well. This trial-and-error approach, just a little bit at a time, usually helps you get that ideal fit.
What Do You Do if the Hole is a Bit Tricky When You Patch a Hole in Drywall?
Sometimes, the opening in your wall isn't a neat, clean circle or square. Maybe you made a little mistake when drilling, and the new opening is very close to an old one, or perhaps they even overlap a bit. When this happens, you have a couple of good options to consider. It's not a big deal, really, just a slightly different approach.
One way to handle this is to simply make the damaged area larger. You can cut out a bigger square or rectangle that takes in both the old and new openings, making one larger space to fix. Then, you'd just prepare a larger patch to fill that bigger space. This often makes the repair simpler because you're dealing with one clean, big area instead of two awkward, overlapping ones. It's a straightforward solution, you know, for combining a couple of smaller issues.
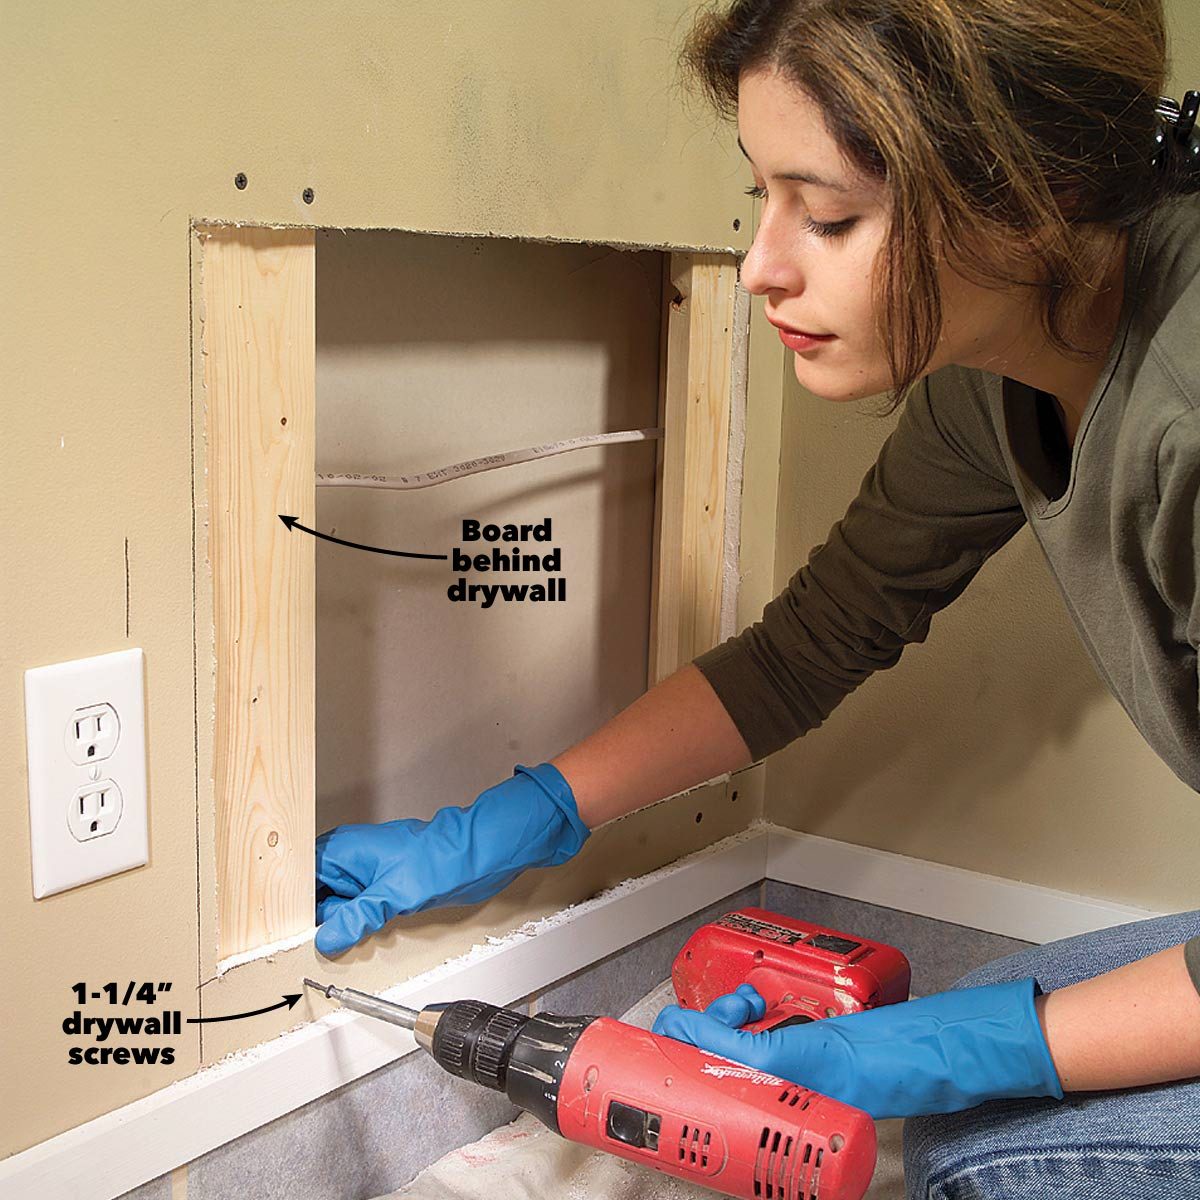
Another smart approach, especially if you want to keep the patch smaller, involves adding some wooden strips behind the wall. You can cut small pieces of wood, like furring strips, and slide them behind the wall, making sure they extend past the edges of the opening. Then, you can screw these strips into the existing wall material. This gives you something solid to attach your smaller patch to. Once your patch is in place, you'd then fill the spaces where the patch meets the old wall with a joint compound, pushing it firmly into those gaps with a small tool. This method is quite handy for providing a solid backing for your repair.
Filling the Gap with Compound When You Patch a Hole in Drywall
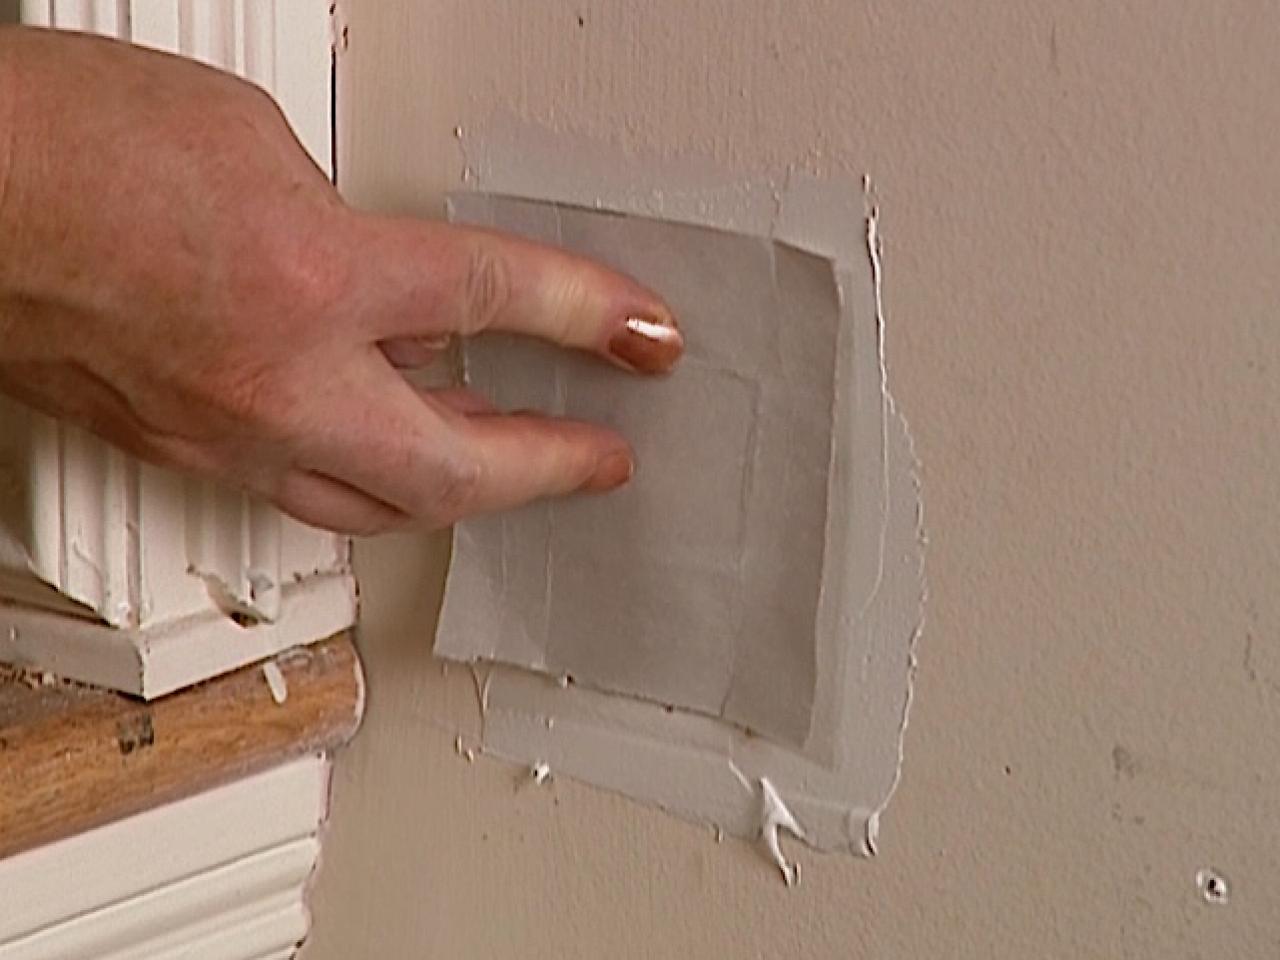
After your new piece of wall material is in place, the next big step is to make it blend seamlessly with the rest of the wall. This is where joint compound, sometimes called "hot mud" if it's a quick-setting type, comes into play. You'll want to apply this material to fill in the gaps around your new patch and to cover the surface, making it all one smooth plane. It's a bit like frosting a cake, you know, aiming for an even layer.
It's also important to remember where the joint tape goes. The tape is meant to go over the opening, not inside it. So, once you've applied a thin layer of compound to fill the hole and surrounding area, you'll lay the joint tape right over the opening. Make sure the tape extends a little beyond the edges of the patch, overlapping onto the undamaged wall. This helps to strengthen the repair and prevent cracks from showing up later. Then, you'd apply another thin layer of compound over the tape, making sure it's fully covered and smooth. You'll then let that dry completely before moving on to the next coat.
The right way to approach this is to first put a layer of compound to fill the opening itself, making it somewhat level with the wall. Then, you'd place your tape over that filled spot, making sure it sticks well and covers the edges where your patch meets the old wall. After that, you spread another layer of compound over the tape, feathering it out so it gradually thins towards the edges. This helps the repair disappear into the wall surface. It takes a little practice to get it perfectly flat, but it's very doable, honestly.
How Do You Make Your Own Drywall Patch?
If you happen to have some extra pieces of wall material lying around from another project, you're in luck! You can easily create your very own patch. This is often a very economical way to fix things, as you're using materials you already possess. It gives you a lot of control over the size and shape, too, which is quite nice.
A good starting point for making your own patch is to make the opening in the wall a nice, clean square or rectangle. Many people find it easiest to use a utility blade or a small keyhole saw to square off the damaged spot. This creates a very regular shape, which then makes it much simpler to cut a matching piece for your patch. A neat, geometric opening means a much more precise fit for your repair piece, as a matter of fact.
Once you have a perfectly squared-off opening, you can then use that opening as a kind of guide. You'll measure its dimensions carefully, or even place a piece of paper over it and trace the outline. Then, you'll take your extra piece of wall material and cut a new piece that matches those exact measurements. The goal is to make the new piece the same size as your opening. A very precise cut here means less work later on, making the overall repair look much better.
Getting the Surface Just Right for How to Patch a Hole in Drywall
Once you've got your patch in place and your first layer of compound is dry, you'll want to make sure the surface is as smooth as can be. This means checking for any small, loose bits of paper or rough edges around the patch. It's pretty important to get rid of these because they can create bumps or unevenness when you apply subsequent layers of compound or paint. You want the surface to feel consistent, almost like the original wall.
You can use your sharp blade to carefully shave away any lingering paper fuzzies or raised edges. Some people even angle the blade slightly to create a very subtle V-shaped groove around the perimeter of the patch. This helps the patching material really settle in and bond well, making the transition from the old wall to the new patch practically invisible. It's a small step, but it contributes a lot to a professional-looking finish, you know.
The aim is to make the edges of your repair blend seamlessly into the surrounding wall. This means no little pieces of the wall's facing paper sticking up or creating a ridge. A smooth edge allows the joint compound to be spread evenly, creating a flat surface that will be ready for sanding and then painting. Taking the time to do this careful prep work really makes a difference in the final appearance, honestly.
What About Those Really Deep Spots in How to Patch a Hole in Drywall?
Sometimes, the opening in your wall might be more than just a surface ding; it could be quite deep. When you're dealing with a deeper spot, the fixing process might take a little more time and perhaps a few more layers of patching material. It's not a big deal, you know, just something to be aware of. A deeper repair usually means you can't just fill it all in one go.
For these deeper openings, you might need to apply the joint compound in several thin layers, allowing each layer to dry completely before putting on the next one. This helps prevent cracking and ensures the compound cures properly. It's a bit like building up the surface gradually, making sure each coat is solid before adding more. This patience really helps create a strong and lasting repair.
If the opening is particularly large or deep, you might consider one of the options mentioned earlier, like cutting out a larger area to make a bigger patch, or adding wooden strips behind the wall for support. These methods provide a solid foundation for your repair, especially when there's a lot of missing material. Then, you would cut a piece of the wall material to fit that space, or use the support strips to secure a smaller patch, and then proceed with filling the joints and smoothing the surface as usual.
:max_bytes(150000):strip_icc()/repair-a-large-hole-in-drywall-1824831_03_install_patch_1545-68477076e16b4775b65d51fe92b17122.jpg)
How to Patch a Large Hole in Drywall
How to Patch a Hole With Scrap Drywall | how-tos | DIY
Drywall Repair: How to Patch a Hole in the Wall
