Mountain Drawing- A Simple Creative Outlet
Creating pictures of mountains, it turns out, is a rather straightforward and simple artistic pursuit. These drawn peaks can be a truly helpful visual aid for making outdoor scenes that hint at how far away things are. It’s almost like you are peeking out across a vast, open space, isn't it? Such pictures, with their grand forms, have a way of making any scene feel much bigger, suggesting distances that stretch on and on, which is quite neat for any artist looking to add a sense of scale to their work.
These majestic land formations, with their impressive shapes, are, naturally, a very popular thing to sketch or paint. They lend themselves well to all sorts of creative expressions, from quick pencil marks to more detailed paintings. People just seem drawn to their strong presence and varied outlines, making them a go-to choice for anyone wanting to put something striking on paper, or canvas, or whatever surface they happen to be working on, you know?
So, if you’ve ever wanted to give this a try, you are in luck. There are plenty of easy ways to get started, whether you are just picking up a pencil for the first time or looking to brush up on some basic artistic skills. These methods often break things down into small, easy-to-follow steps, making the whole process feel very approachable and, dare I say, fun. It’s a pretty rewarding thing to learn, actually.
Table of Contents
- Why are mountain drawing pieces so popular?
- Getting Started with Your Mountain Drawing
- How does mountain drawing help with light and shadow?
- Discovering Nature's Beauty Through Mountain Drawing
- Is mountain drawing for everyone?
- Simple Steps for Any Mountain Drawing
Why are mountain drawing pieces so popular?
It's a good question, really, why these tall bits of land are such a favorite for artists. Perhaps it's because they stand so strong and tall against the sky, offering a very clear shape that is, in a way, easy to see and put down on paper. They have a certain kind of presence that draws the eye, and that makes them a natural fit for any kind of picture. People, you know, often find comfort or a sense of wonder in looking at them, and that feeling carries over into art.
A mountain drawing, or any art depicting these natural giants, allows for a great deal of variety. You can make them look jagged and sharp, or soft and rolling, depending on the mood you want to create. This versatility means that no two pictures of them have to look exactly alike, which is pretty cool. They offer a simple starting point but allow for a lot of personal touch, which is, I guess, part of their lasting appeal to artists of all sorts.
They also represent something big and enduring, don't they? When you sketch a mountain, you're tapping into something that feels ancient and grand. This feeling, I think, makes the act of drawing them a little more meaningful for many people. It’s not just about lines on paper; it’s about capturing a piece of that vast, quiet power that these natural formations hold. It’s pretty inspiring, actually, when you think about it.
Getting Started with Your Mountain Drawing
If you're thinking about trying your hand at making a picture of a mountain, the good news is that it’s not nearly as hard as you might think. Many folks believe you need special skills, but honestly, it begins with just a few basic ideas. You just need a pencil and a piece of paper, and you are, more or less, ready to go. The key is to start simple and build up from there, which is a pretty common approach in drawing, anyway.
The very first thing you might want to do is to get a general idea of the overall shape. Don't worry about tiny details at this stage; just think about the big outlines. Is it a single peak, or a range of them? Are they pointed, or do they have softer, rounded tops? Just a few loose lines to mark out these big forms is all you need to begin. This initial step is, really, about getting a feel for the space your mountain drawing will occupy.
There are, in fact, many straightforward ways to begin this process, often broken down into easy-to-follow steps. These steps are designed to take away any worry about where to start. You’ll find that by following a simple method, you can quickly put down the main forms of your mountain drawing without feeling overwhelmed. It’s pretty satisfying to see those first lines take shape, you know?
Basic Shapes in Mountain Drawing
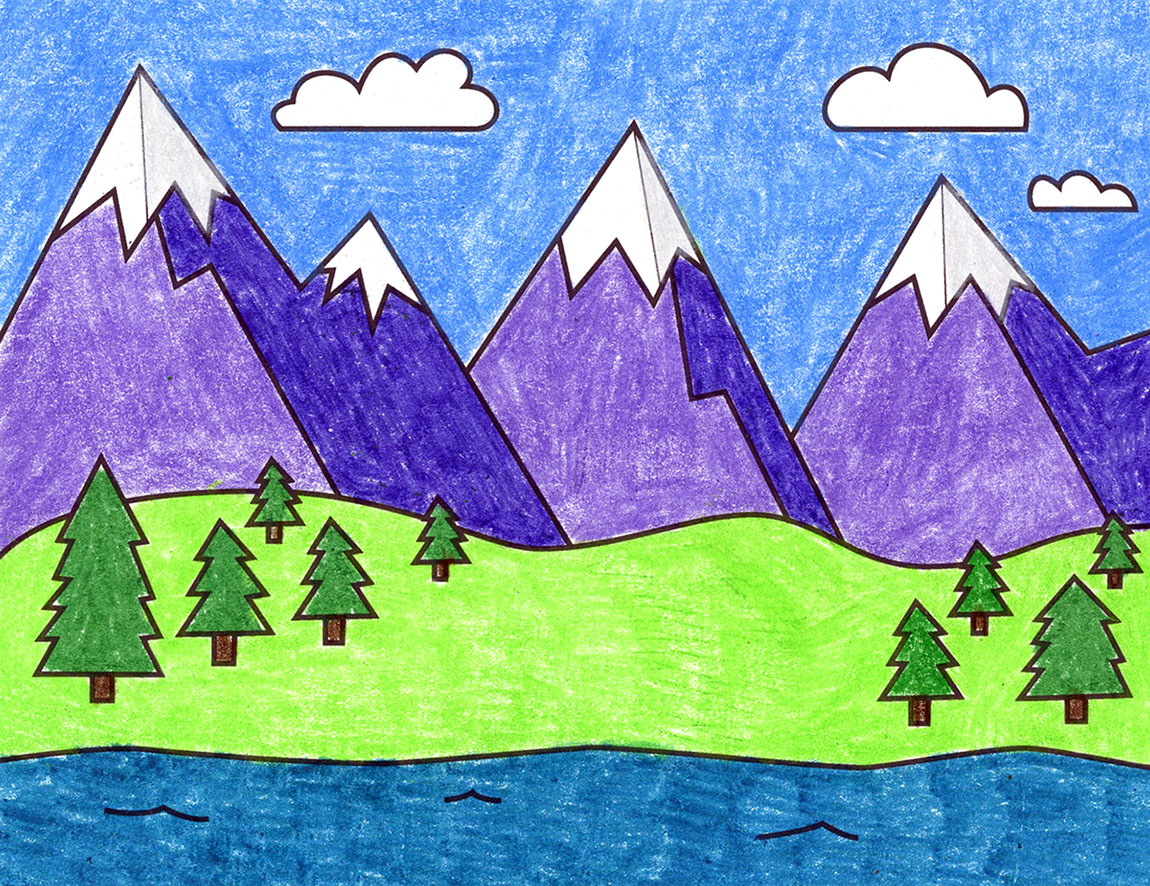
When you first approach making a picture of a mountain, it’s helpful to think of them as simple shapes. A lot of the time, they are, basically, just big triangles, or maybe a series of triangles joined together. You can start by sketching these basic geometric forms very lightly on your paper. This helps you get the general arrangement down before you add any more specific features, which is a sensible way to approach things.
Once you have these simple shapes in place for your mountain drawing, you can then begin to soften them or make them a little more jagged, depending on the kind of mountain you want to show. Perhaps you want a very sharp, craggy peak, or maybe something a bit more rounded and gentle. The initial simple shapes act as a guide, letting you adjust and refine without having to erase too much, which is pretty handy, actually.
This method of starting with basic shapes is, truly, a cornerstone of many drawing techniques, and it works wonderfully for mountains. It allows you to build up your picture in stages, adding complexity bit by bit. It gives you a solid base to work from, and that, in turn, helps you feel more confident as you move forward with your mountain drawing. It’s a very forgiving way to learn, too.
How does mountain drawing help with light and shadow?
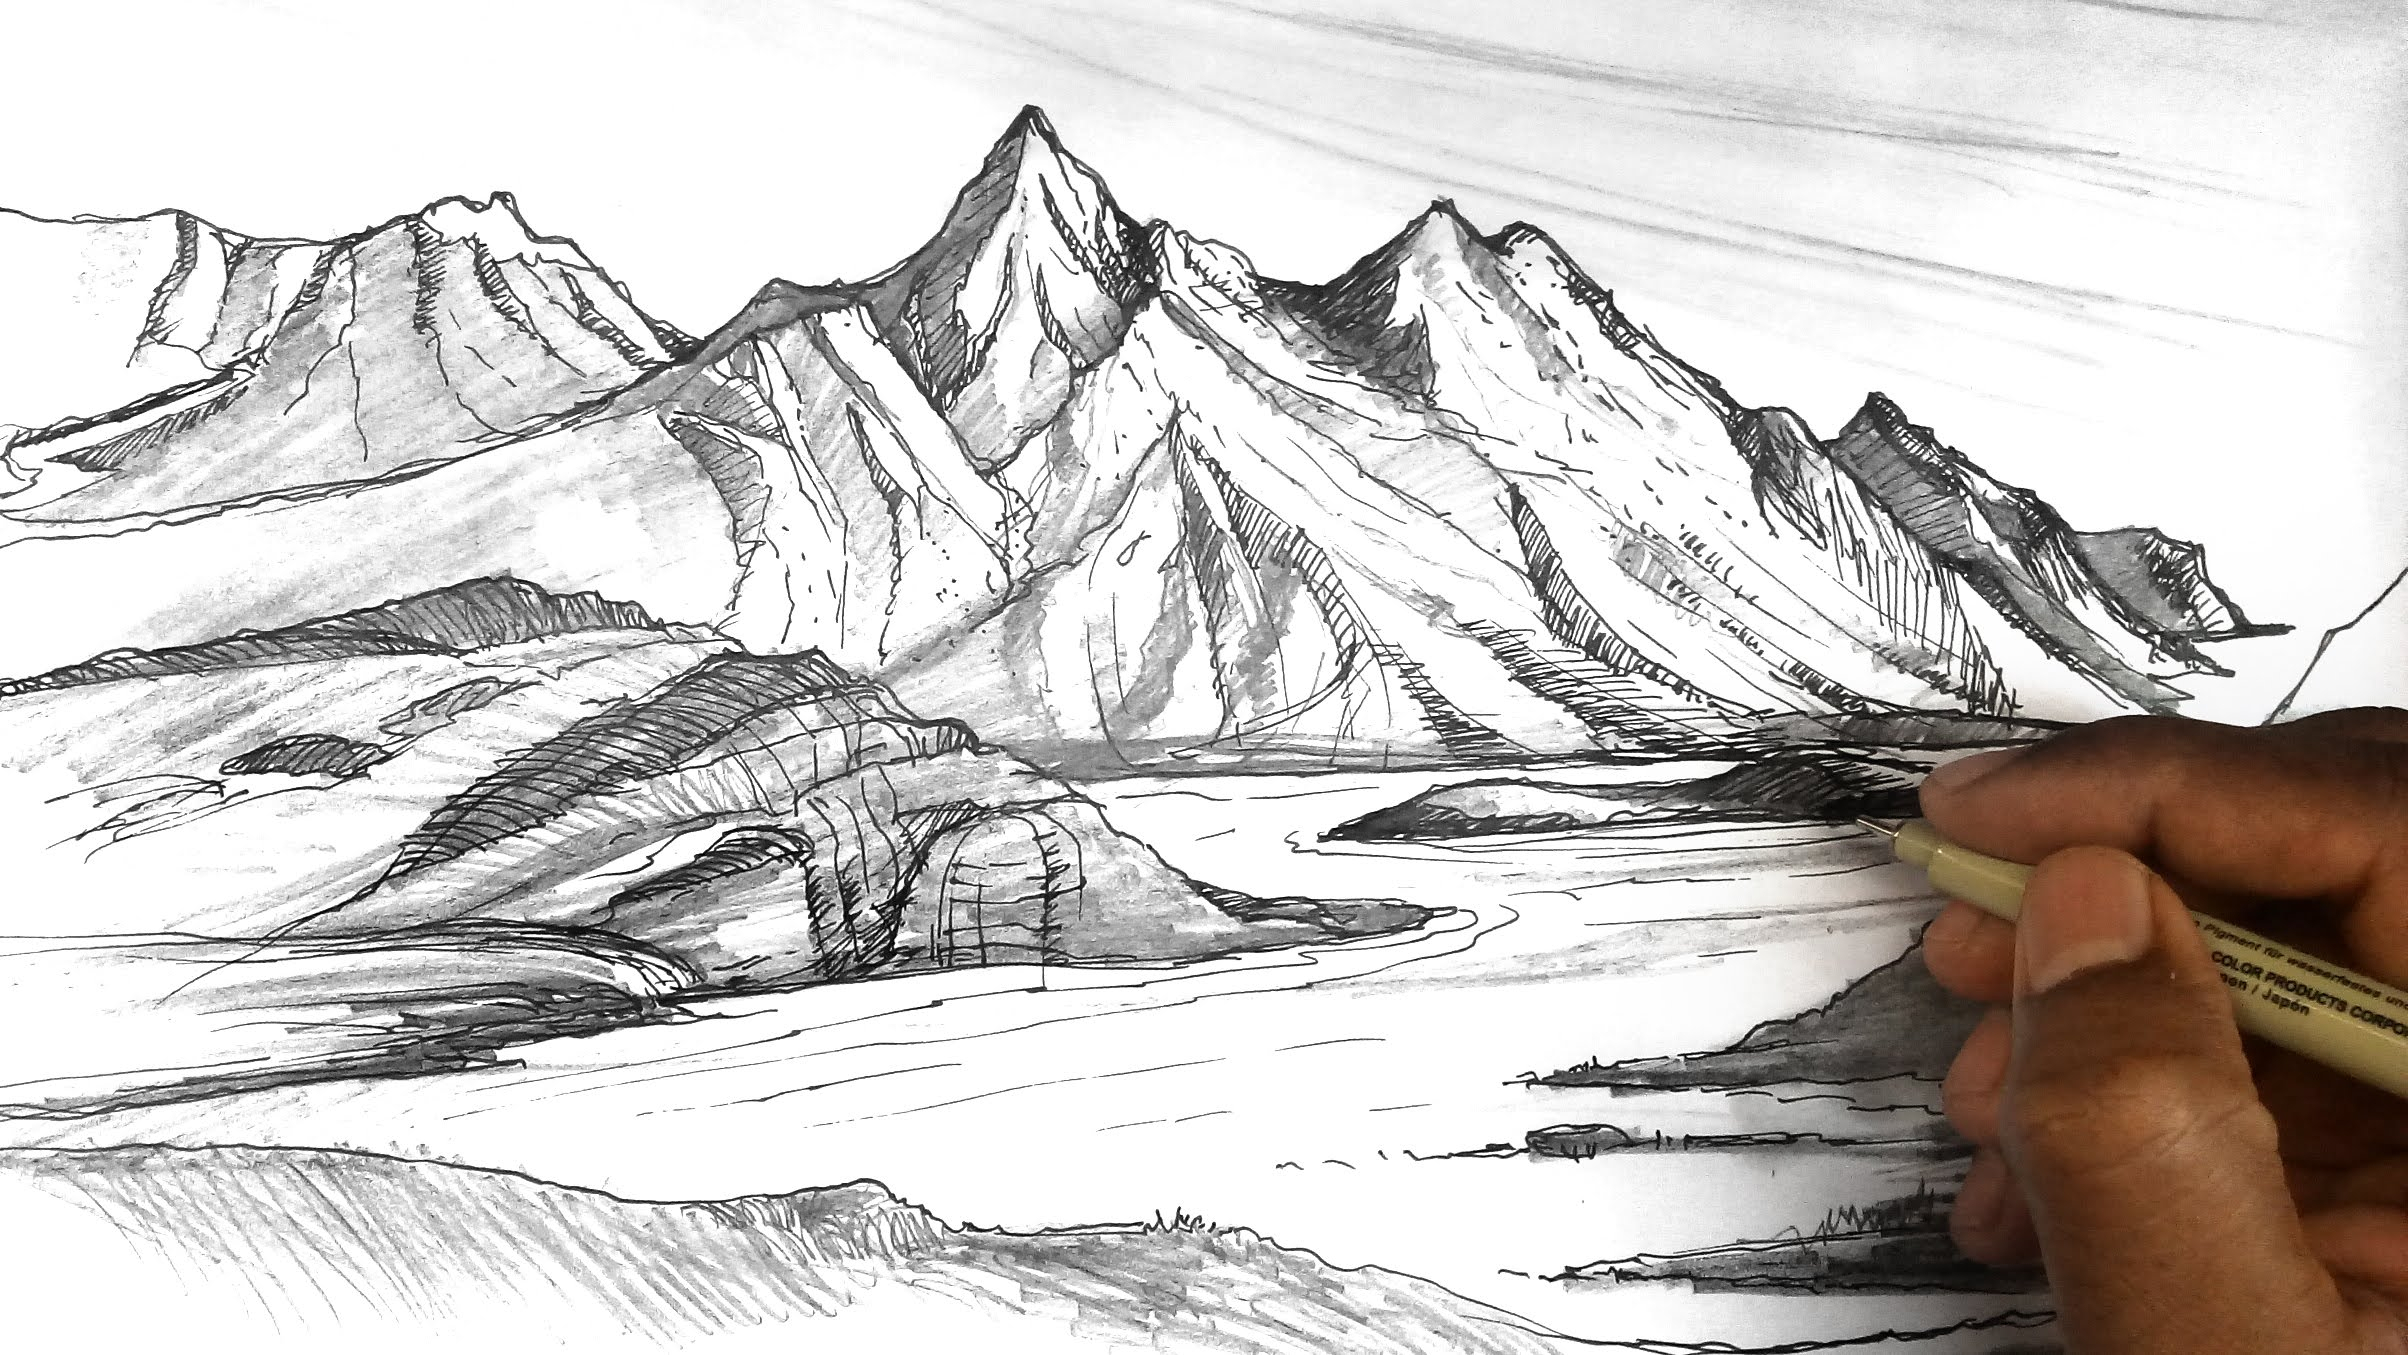
Making pictures of mountains is, honestly, a fantastic way to get a handle on how light and shadow work in art. Because mountains have so many different surfaces – some facing the sun, others hidden away – they naturally show off how light hits objects and creates dark areas. It's like a built-in lesson in shading, you know? You can really see how one side catches the sun, while the other falls into deep shade, which is pretty clear to observe.
When you are making a mountain drawing, you’ll start to notice how the light makes some parts stand out and pushes other parts back. This helps you figure out where to make your lines darker or lighter, and where to add softer shading. It’s a practical way to understand how to give your drawings a sense of depth and form, making them look less flat and more like they are actually there, which is, I guess, the goal for many artists.
Learning to use light and shadow well is, in fact, one of the most important skills in drawing, and mountains offer a perfect subject for this. You get to play around with different levels of darkness and lightness, seeing how they change the way your mountain looks. It’s a really engaging way to learn about how to give your art that three-dimensional feel, and it’s something you can apply to almost anything else you decide to draw, too.
Discovering Nature's Beauty Through Mountain Drawing
There is something quite special about making a picture of a mountain; it’s a way to truly connect with the natural world, even if you’re just sitting at your desk. You get to think about the vastness of these natural forms and the quiet strength they possess. It’s almost like you are taking a small piece of that outdoor grandeur and bringing it to life on your paper, which is a pretty cool feeling, honestly.
A mountain drawing can, in some respects, be a moment of calm and focus. As you sketch the lines and shapes, you might find yourself thinking about the real mountains, how they stand, and the way the light plays on their surfaces. This can be a very relaxing thing to do, a quiet activity that allows you to appreciate the sheer scale and beauty of nature in a very personal way. It’s a bit like a mini-getaway, isn't it?
Through the act of drawing them, you start to notice details you might otherwise miss when just looking at a photograph or a real mountain. You see the subtle changes in the slopes, the way one peak rises above another, or how different rock formations create unique patterns. This kind of close observation is, in fact, a wonderful way to deepen your appreciation for the natural world, and it makes your mountain drawing feel more authentic, too.
Is mountain drawing for everyone?
Honestly, yes, it pretty much is. You don't need any prior experience or special talent to start making pictures of mountains. The simple methods available are designed for anyone who wants to give it a go, whether you are just a young person picking up a pencil for the first time or an adult looking for a relaxing creative outlet. It’s a very welcoming kind of art, in a way, that doesn't ask for much beyond a willingness to try.
Many of the step-by-step guides you can find are, in fact, made specifically for those who consider themselves beginners. They break down the whole process into such small, manageable pieces that it feels less like a challenge and more like a fun activity. You just follow along, step by step, and before you know it, you’ll have a mountain drawing that you can be pretty proud of, which is a nice feeling.
So, if you’ve ever thought about trying to draw but felt like it was too hard, or that you weren’t "artistic enough," then making pictures of mountains might be just the thing to change your mind. It’s a simple, rewarding starting point that can build your confidence and show you that anyone can create something beautiful with just a little guidance. It’s pretty accessible, actually, for just about anyone.
Simple Steps for Any Mountain Drawing
When you’re ready to put pencil to paper for your mountain drawing, you can approach it with a very simple plan. The first step, as we talked about, is to get those big, basic shapes down. Don’t press too hard with your pencil; keep your lines light and loose. This lets you make changes easily without leaving marks, which is, honestly, a lifesaver for beginners.
Next, you can start to refine those initial shapes. Think about where the peaks are sharpest and where the slopes might be a bit more gentle. You can add some smaller, jagged lines to suggest rocky edges or smooth curves for snow-covered hills. This is where your mountain drawing starts to get its unique character, you know? It’s about adding those little touches that make it yours.
After you have the main forms, you can begin to think about how light hits your mountain. Pick a direction for your light source – perhaps the sun is coming from the upper left. Then, all the surfaces facing that light source will be brighter, and the surfaces facing away will be in shadow. This is where you start to add your shading, making some areas darker and others lighter, which gives your mountain drawing a real sense of depth. It’s a really cool effect, too.
Finally, you can add some finer details. Maybe some lines to show cracks in the rock, or subtle textures to suggest snow or trees on the lower slopes. These small additions can really bring your mountain drawing to life. Remember, it’s all about building up your picture in easy stages, and enjoying the process as you go. It’s pretty satisfying to see it all come together, isn't it?
Mountain Landscape Drawing at GetDrawings | Free download

Mountain Range Drawings : Mountain Range Ink Clouds Drawing Forest
Easy How to Draw Mountains Tutorial Video and Coloring Page
